Zoom Lecture Recording AI Summary: Exam Study Notes (2026)
Zoom Lecture Recording AI Summary: A Complete Guide to Generating Study Notes for Exam Season (2026)
Short answer: Turning a Zoom lecture recording into study notes takes just three steps — first, grab the recording file from Zoom’s cloud recordings page or your local computer folder; second, paste or upload the recording to an AI tool, which instantly transcribes it and generates a structured summary; third, refine that summary into key-point notes, review flashcards, and exam Q&A. For a 90-minute lecture, the whole process takes just a few minutes — no more scrubbing through playback from the start.
Here’s the full walkthrough using BibiGPT, which supports 30+ platform links and local audio/video files and has already generated 5 million+ summaries for over 1 million users. If you have a backlog of lecture recordings on hand, follow along in real time. Paste your Zoom recording into BibiGPT and try it now — you’ll see your first summary in under a minute.
1. Why Zoom Lecture Backlogs Are the Biggest Pain Point for International Students During Exam Season
June is when exam seasons collide worldwide: US universities are in the middle of or just wrapping up finals week, UK taught-programme students are entering dissertation season and need to rewatch an entire semester of seminar recordings, and Australian universities have final exams scheduled in June too. According to the IIE Open Doors 2025 report, there were 1,177,766 international students enrolled at US colleges and universities in 2024/25 — a record high and a 5% year-over-year increase — a trend confirmed by ICEF Monitor’s analysis. That means millions of students every year are working through rigorous coursework in a second language, and recorded lectures are both their most relied-upon resource and the one most likely to pile up.
The backlog isn’t caused by laziness. Research published on NIH PMC on lecture recording behaviour found that the top reason students watch recordings is exam preparation and catching up on missed classes — yet only about 33% of students said they were “likely” to watch a missed recording within a week, and roughly 39% watched a full recording from start to finish. Where do the rest of those recordings end up? Saved for the final week before exams.
A single 90-minute class times 12 weeks equals 18 hours of pure playback. Add the two burdens unique to international students — struggling to follow professors’ accents and pace, and needing extra time to process technical vocabulary — and “rewatching every lecture” simply isn’t viable during exam season.
Practical rule: Your goal in the week before exams isn’t to watch recordings — it’s to extract the exam-relevant content from them. Playback consumes time; extraction is revision.
2. Step 1: Get Your Zoom Recording File
First, gather your source material. Zoom recordings are stored in two places — use the table below to find yours:
| Recording Type | Where to Find It | How to Get the File |
|---|---|---|
| Cloud Recording | Log in to zoom.us → “Recordings” on the left → “Cloud Recordings” | Open the meeting topic → click “Download”; choose full video or audio only |
| Local Recording | The “Zoom” folder inside “Documents” on your computer | Find the mp4 / m4a file for the relevant date |
| Link shared by your professor | Course email, Canvas / Moodle announcements | Most allow online viewing; some have a download button |
According to Zoom’s official support documentation, local recordings are saved by default in a “Zoom” folder inside your computer’s “Documents” directory, while cloud recordings require you to log in to the web portal and visit the “Recordings” page. If you’re having trouble locating a file, the Tactiq guide on finding Zoom recordings covers all the usual hiding spots.
Two common pitfalls:
- Cloud recordings expire. Many institutions set automatic deletion for cloud recordings. Before exam season kicks off, batch-download every recording you’ll need for the whole semester to your local drive.
- Audio-only is enough. If your internet is slow or storage is tight, the “Audio Only” file is perfectly sufficient for transcription and summarisation — and it’s much smaller.
Practical rule: On your first evening of revision, don’t watch anything yet. Do one thing instead: download and archive all 12 weeks of recordings. Once the raw material is in hand, every step that follows becomes a pipeline.
3. Step 2: Paste into AI for Instant Transcription and Summary
Once you have the recording, hand it off to AI for the heaviest lifting: transcription and structured extraction. Here’s how to do it with BibiGPT:
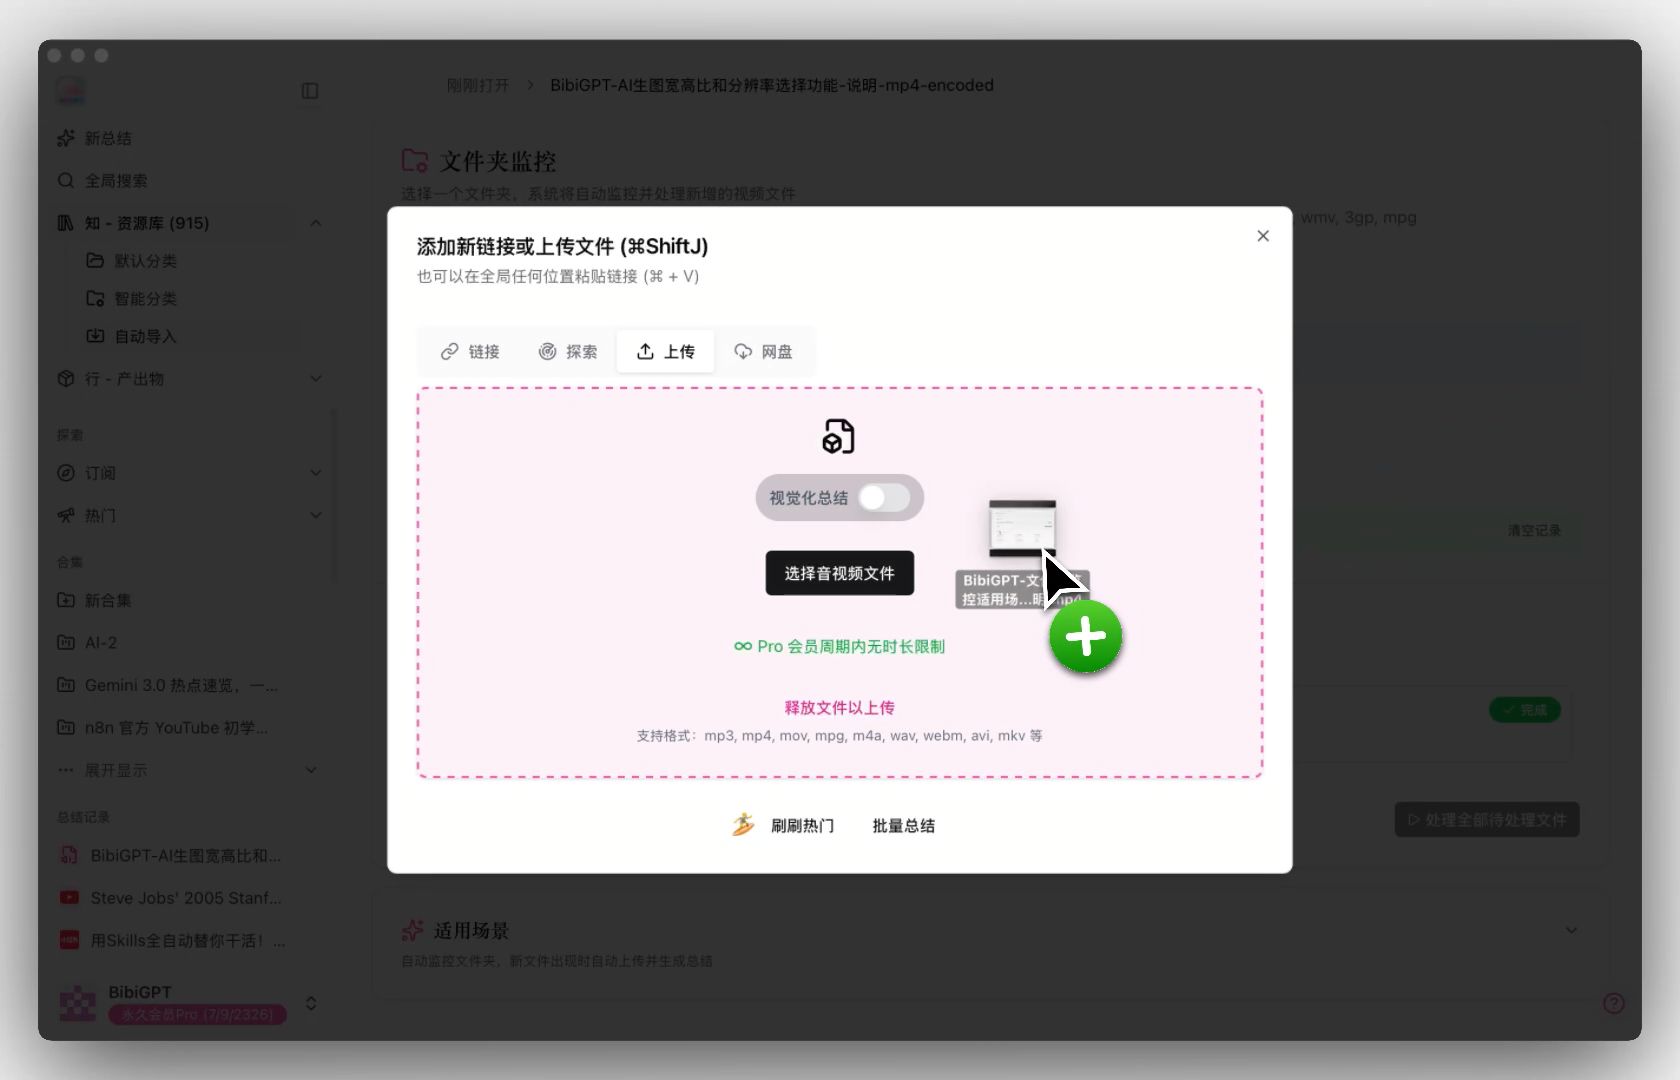
- Open BibiGPT and sign in, then go to the main input field;
- If your professor shared an online recording link (Bilibili, YouTube, podcast, or any of the 30+ supported platforms), paste the link directly;
- If you’ve downloaded an mp4 / m4a file locally, use the local audio/video file transcription entry point and drag-and-drop to upload;
- Wait about a minute to receive the full transcript, section-by-section key points, and a timestamped chapter summary;
- For anything you didn’t understand, click the timestamp to jump directly to that moment in the original recording — no need to scrub from the beginning.
If your recording is a group discussion, office hours session, or supervisor meeting, the free meeting recording transcription tool is a better fit — it organises dialogue by speaker.
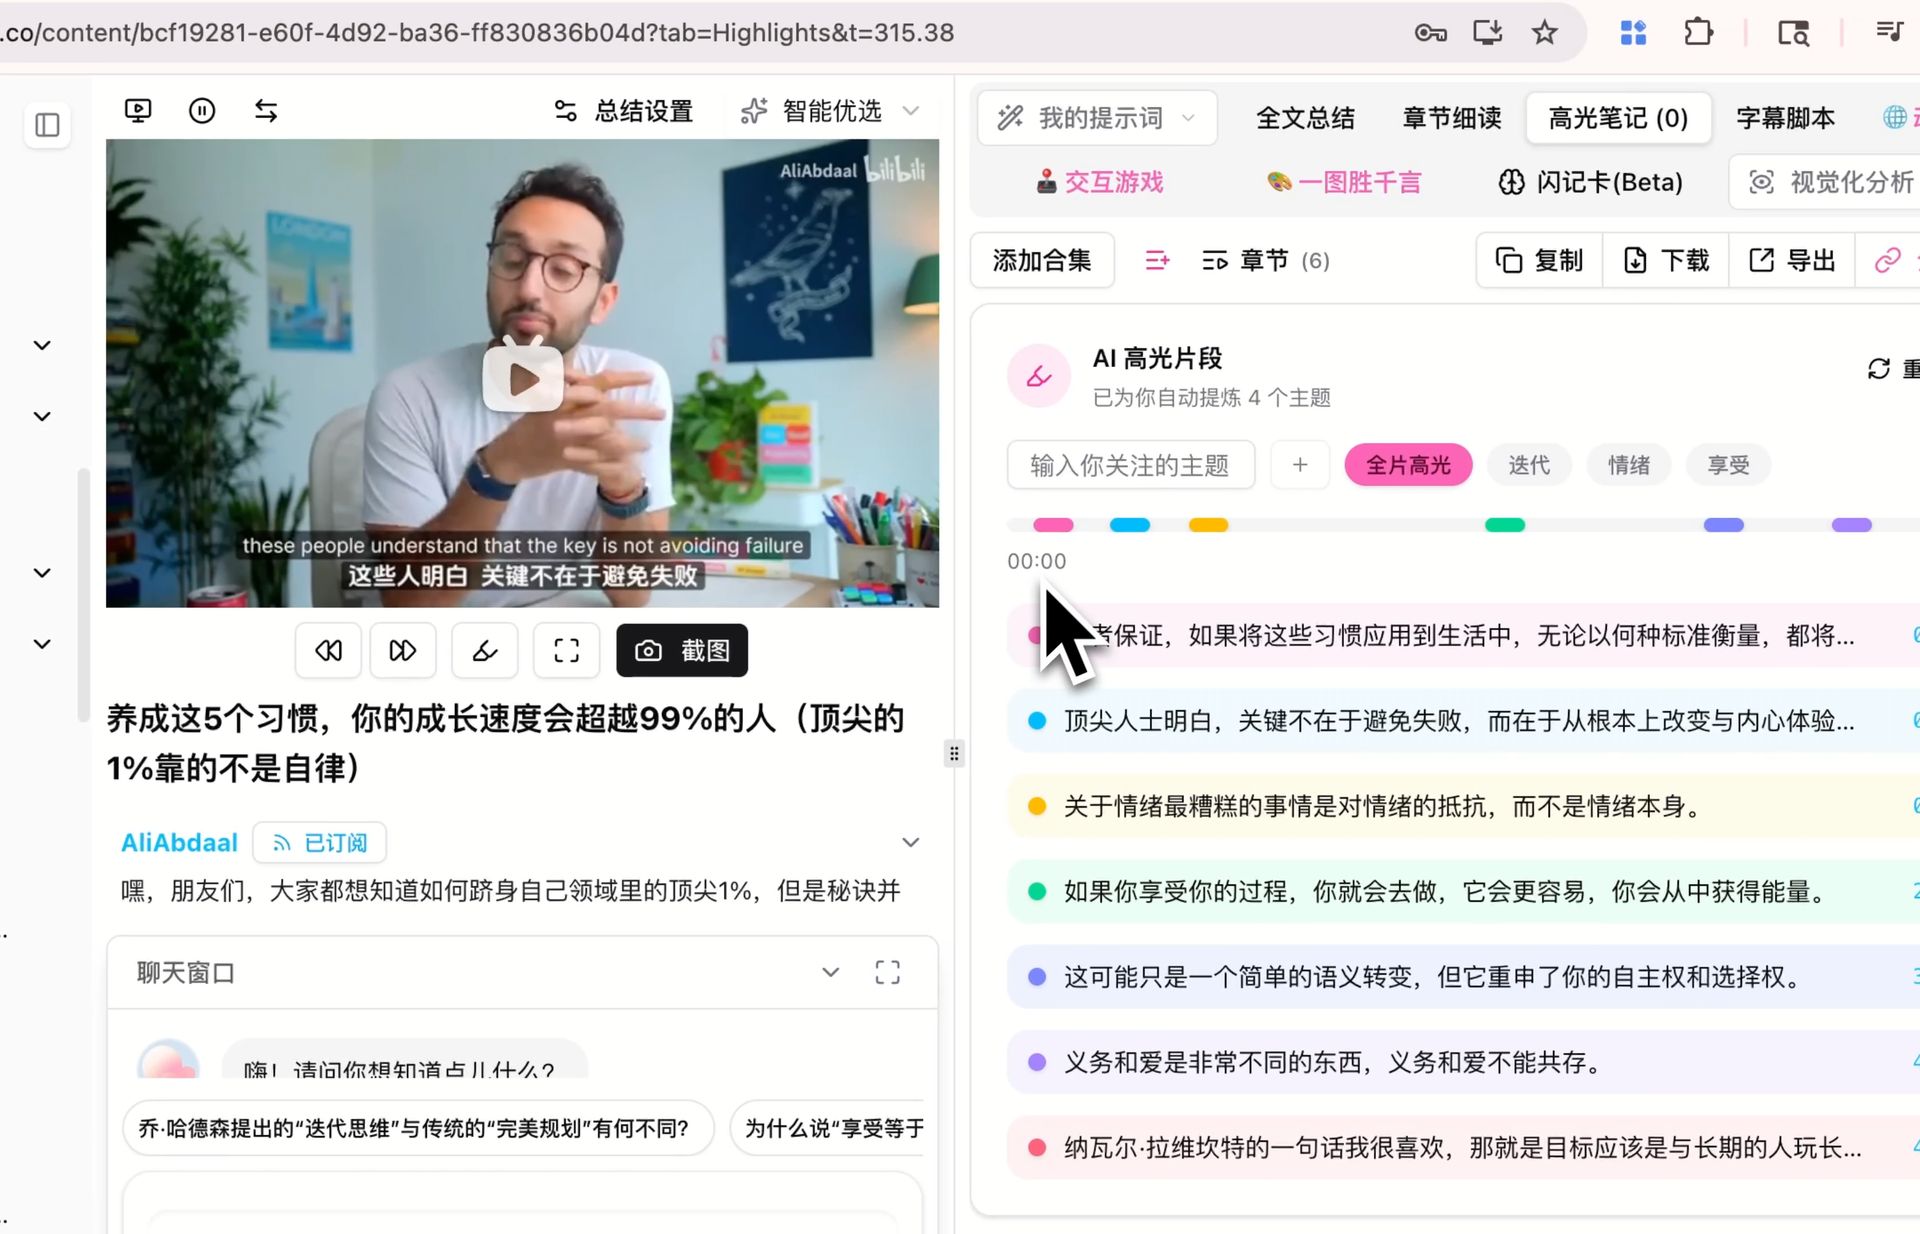
The screenshot below shows what an AI summary actually looks like: the video is on the left, structured key points and a follow-up Q&A entry are on the right. A quick scan before an exam tells you exactly what each lecture covered.
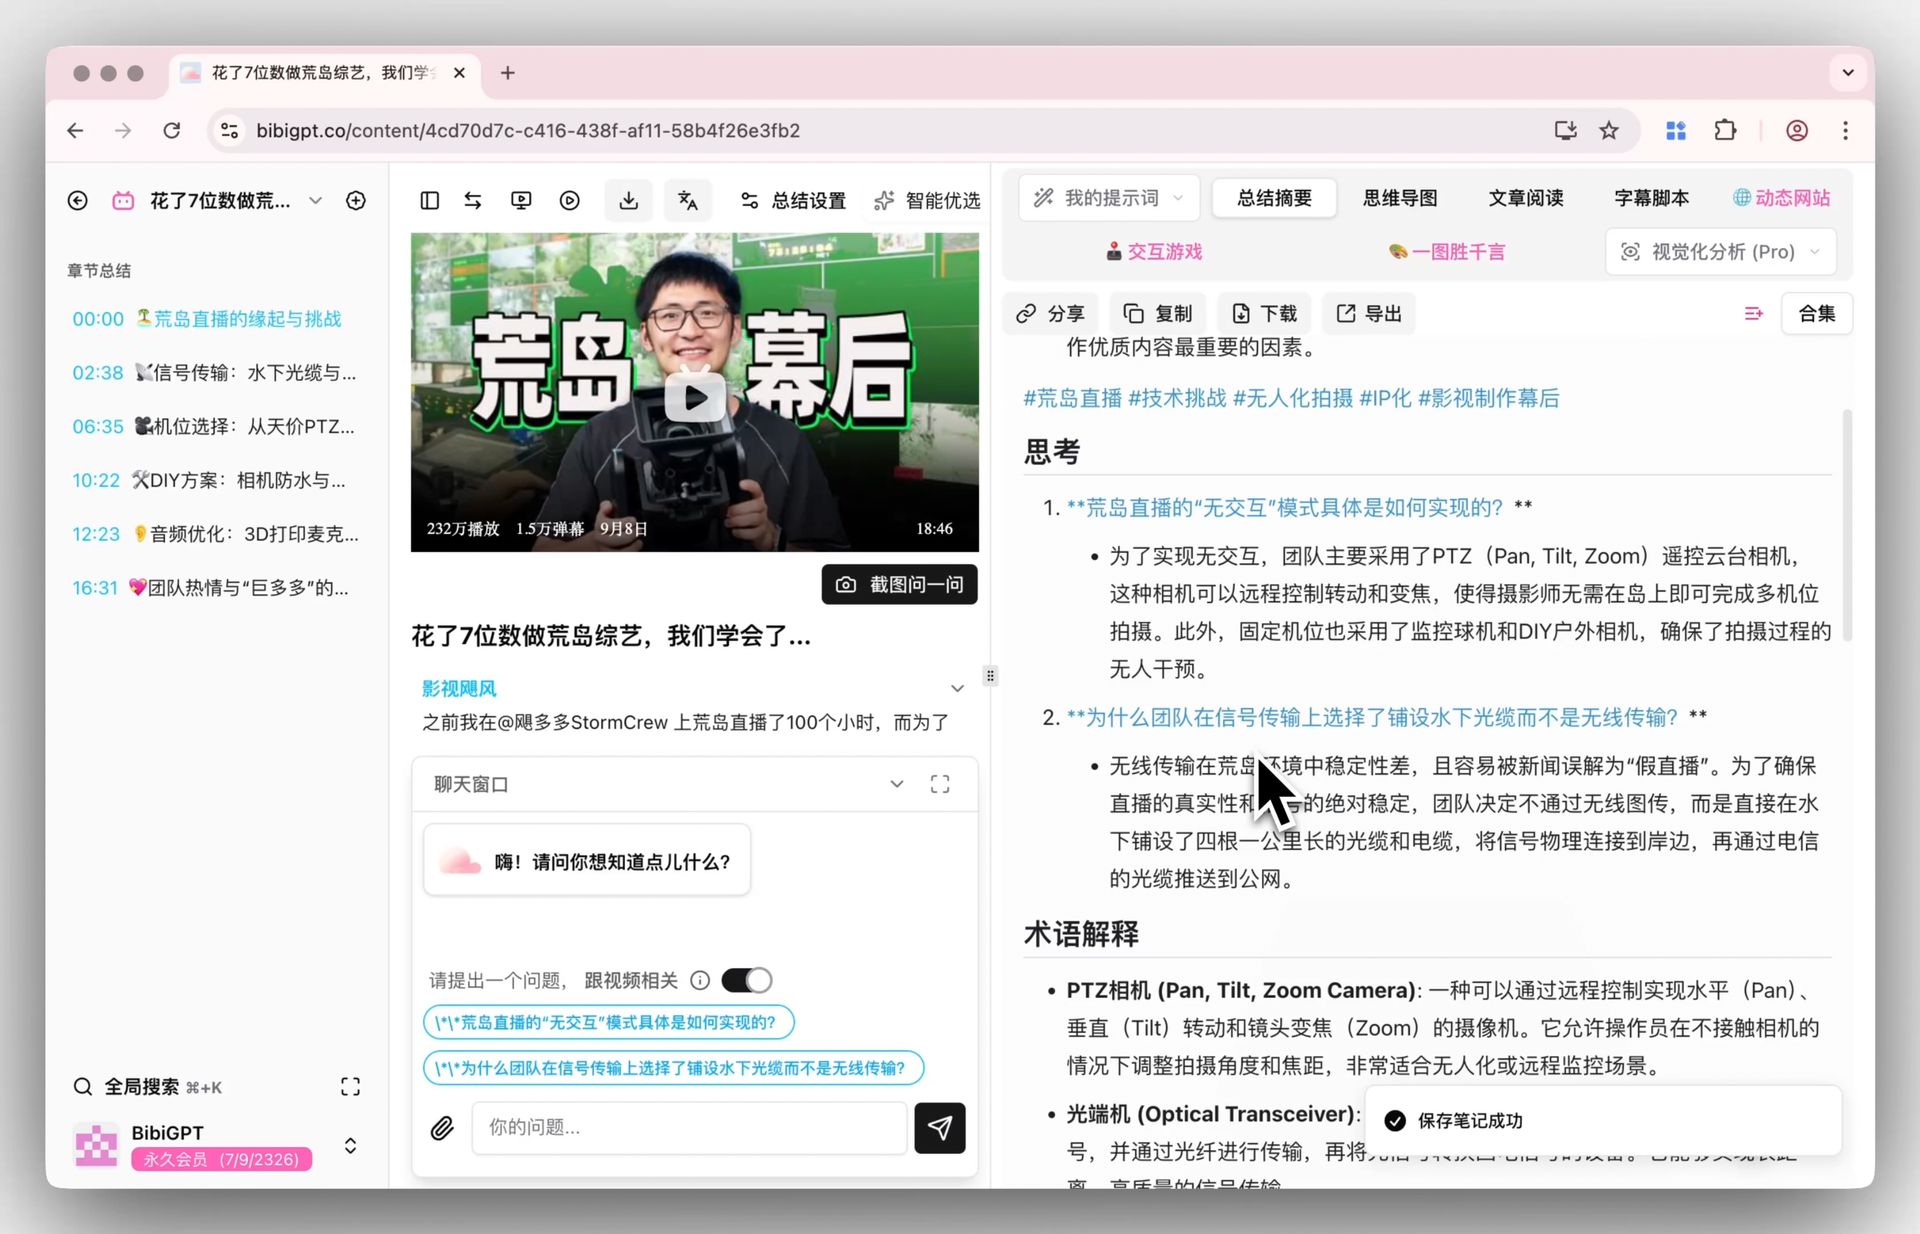
Screenshot: BibiGPT · AI Summary and Follow-up Q&A Interface
Want to see it in action before signing up? Try the interactive demo below:
Summarize any video in seconds
Pick a sample below to see the AI summary — TL;DR, key points, and jump-to timestamps.
TL;DR: Karpathy builds a GPT-style language model from scratch in code, explaining every piece — from a tiny character-level model up to the full Transformer.
Key points
- Start with a bigram model, then add self-attention so tokens can "talk" to each other
- A Transformer block = multi-head attention + feed-forward + residual connections + layer norm
- Training is just predicting the next token; scale and data do the rest
- The same architecture behind nanoGPT is what scales up to ChatGPT
Jump to
- 00:07 Why build GPT from scratch
- 08:23 Self-attention, intuitively
- 1:00:00 Assembling the Transformer block
- 1:35:00 From nanoGPT to ChatGPT
4. Step 3: Turn the Summary into a Full Revision System
The transcript and summary are just intermediate outputs. What actually determines your exam performance is what you do with them. We recommend turning each lecture’s summary into three types of revision material:
| Revision Output | How to Generate | Best Use Case |
|---|---|---|
| Key-point notes | Reorganise the AI summary by “definitions / formulas / worked examples / common mistakes” | Systematic knowledge-framework review before exams |
| Review flashcards | Ask AI to convert key points into Q&A cards: question on the front, answer on the back | Self-testing during spare moments; active recall |
| Exam Q&A | Use the AI follow-up feature to simulate exam questions: “What’s most likely to be tested from this lecture?” | Identify gaps; pinpoint weak chapters |
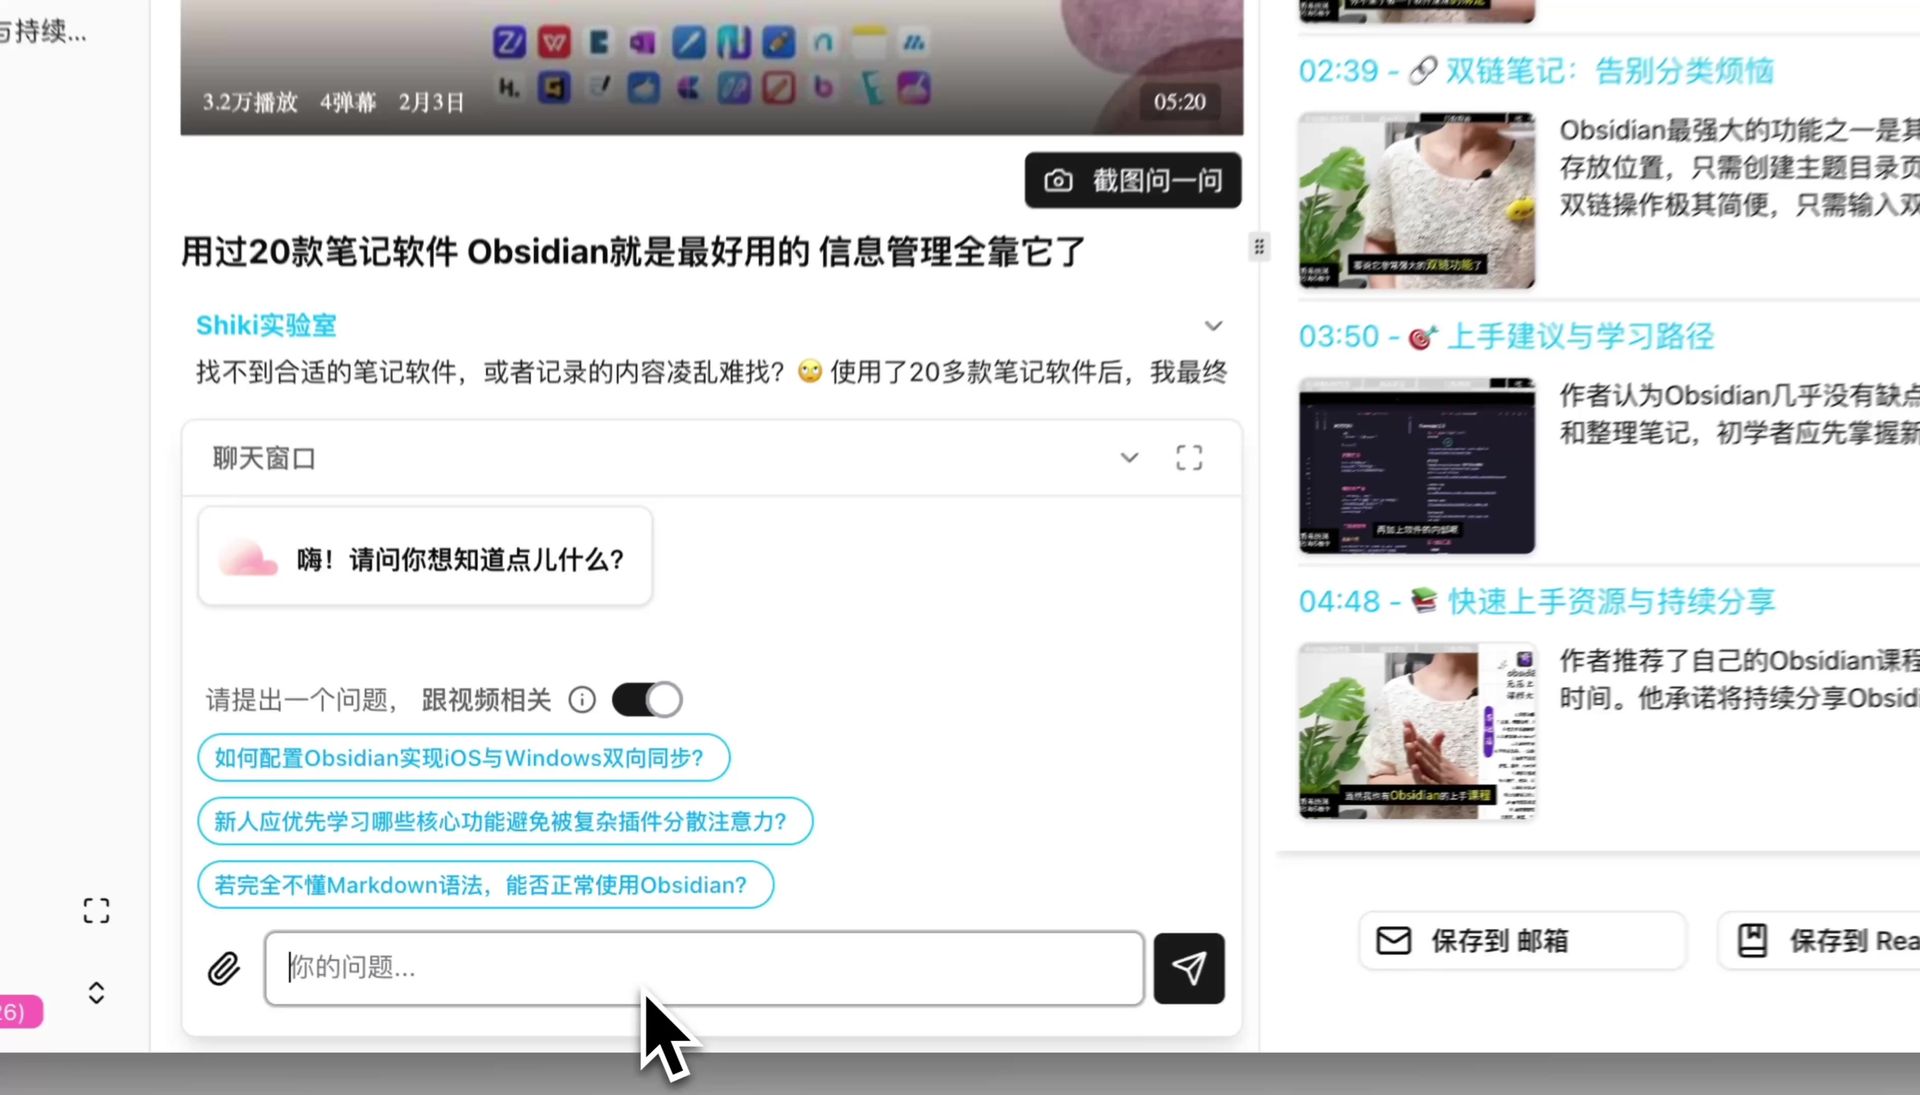
The AI follow-up feature is the step most people skip — and it’s also the one that most closely mirrors an actual exam. A few prompts that work especially well for international students: “Explain the core concept of this lecture in one paragraph, assuming I’ve never encountered it before.” “List every formula mentioned in this lecture along with the conditions for applying each one.” “What points did the professor emphasise repeatedly?” “Write three short-answer questions based on this lecture and provide the answers.” Each response is grounded in the actual content of that lecture — the equivalent of having a TA who watched every recording sit with you and go through the exam topics.
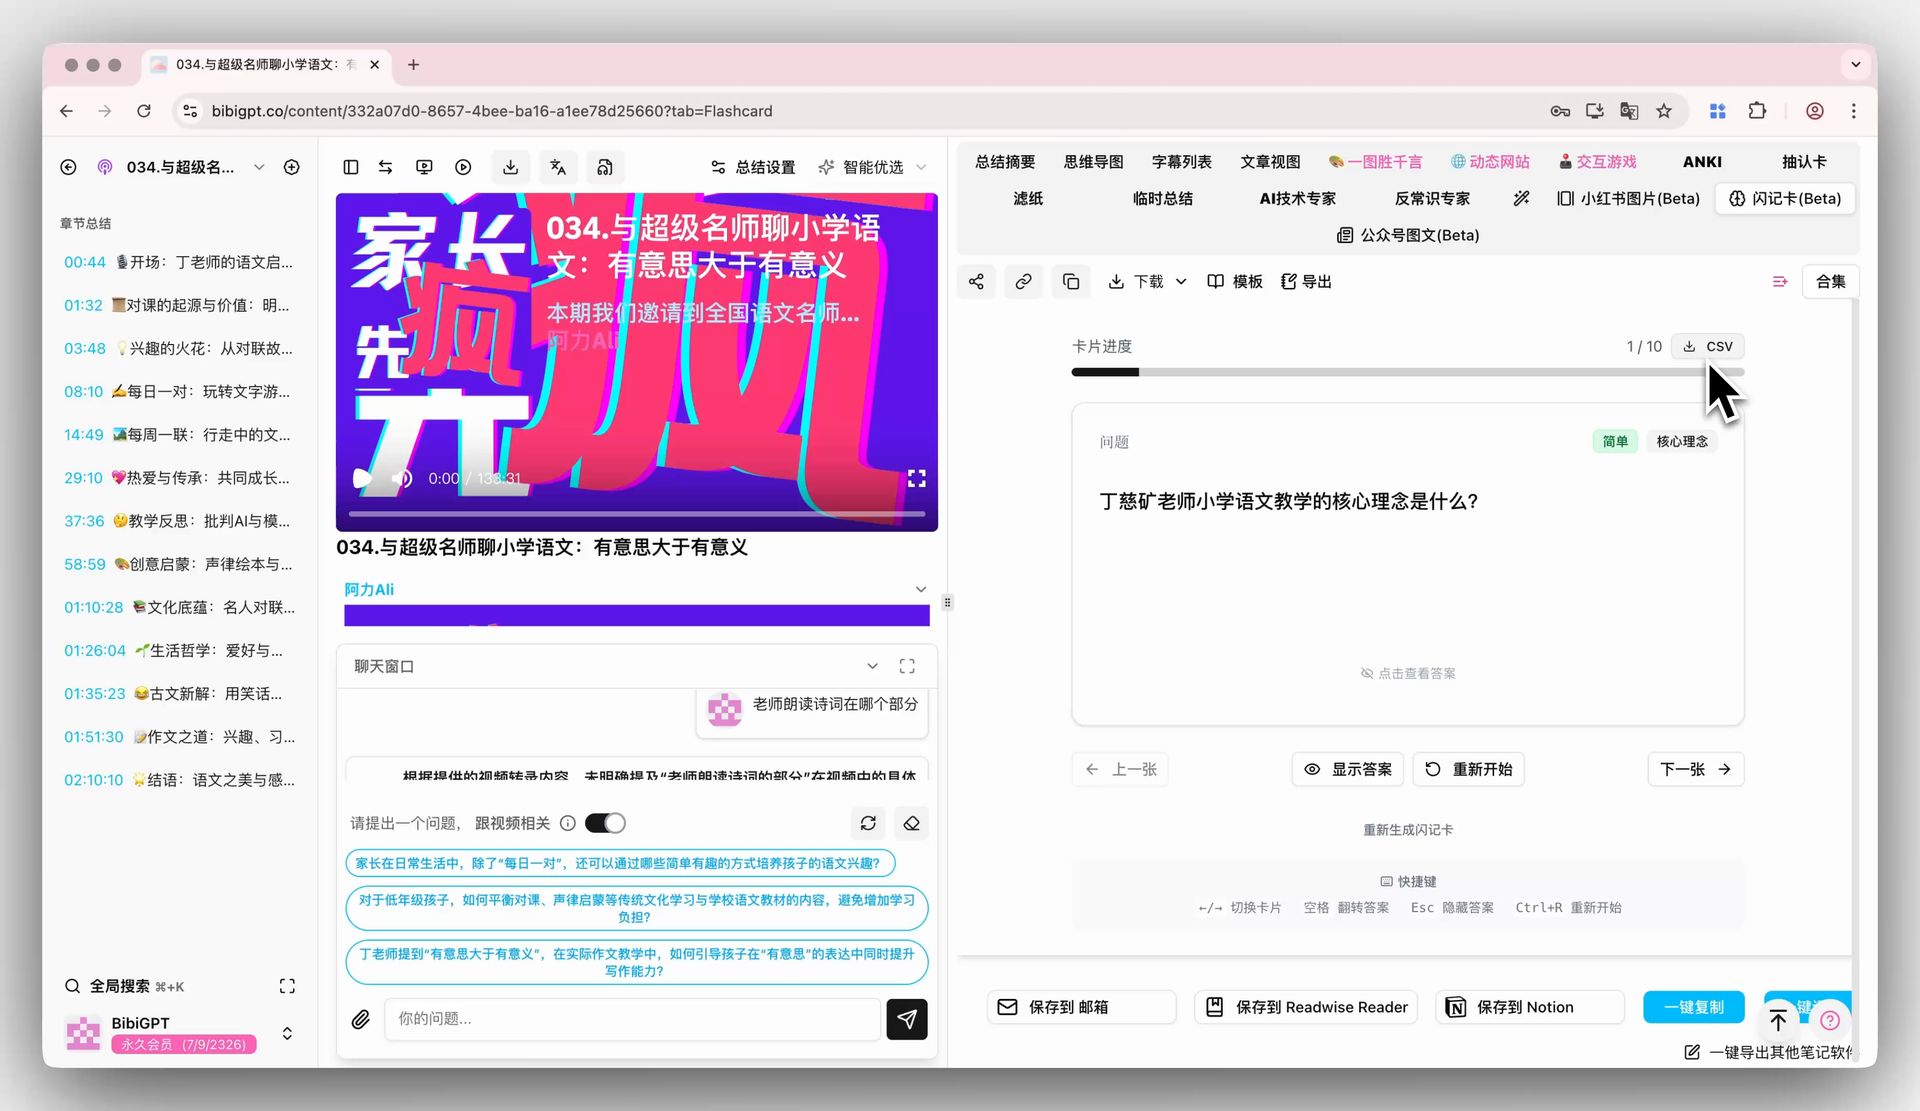
Flashcards offer the best return on time. The image below shows what it looks like after automatically converting a lecture’s key points into review flashcards: question on the front, answer on the back. One pass during your commute is one full active-recall session.
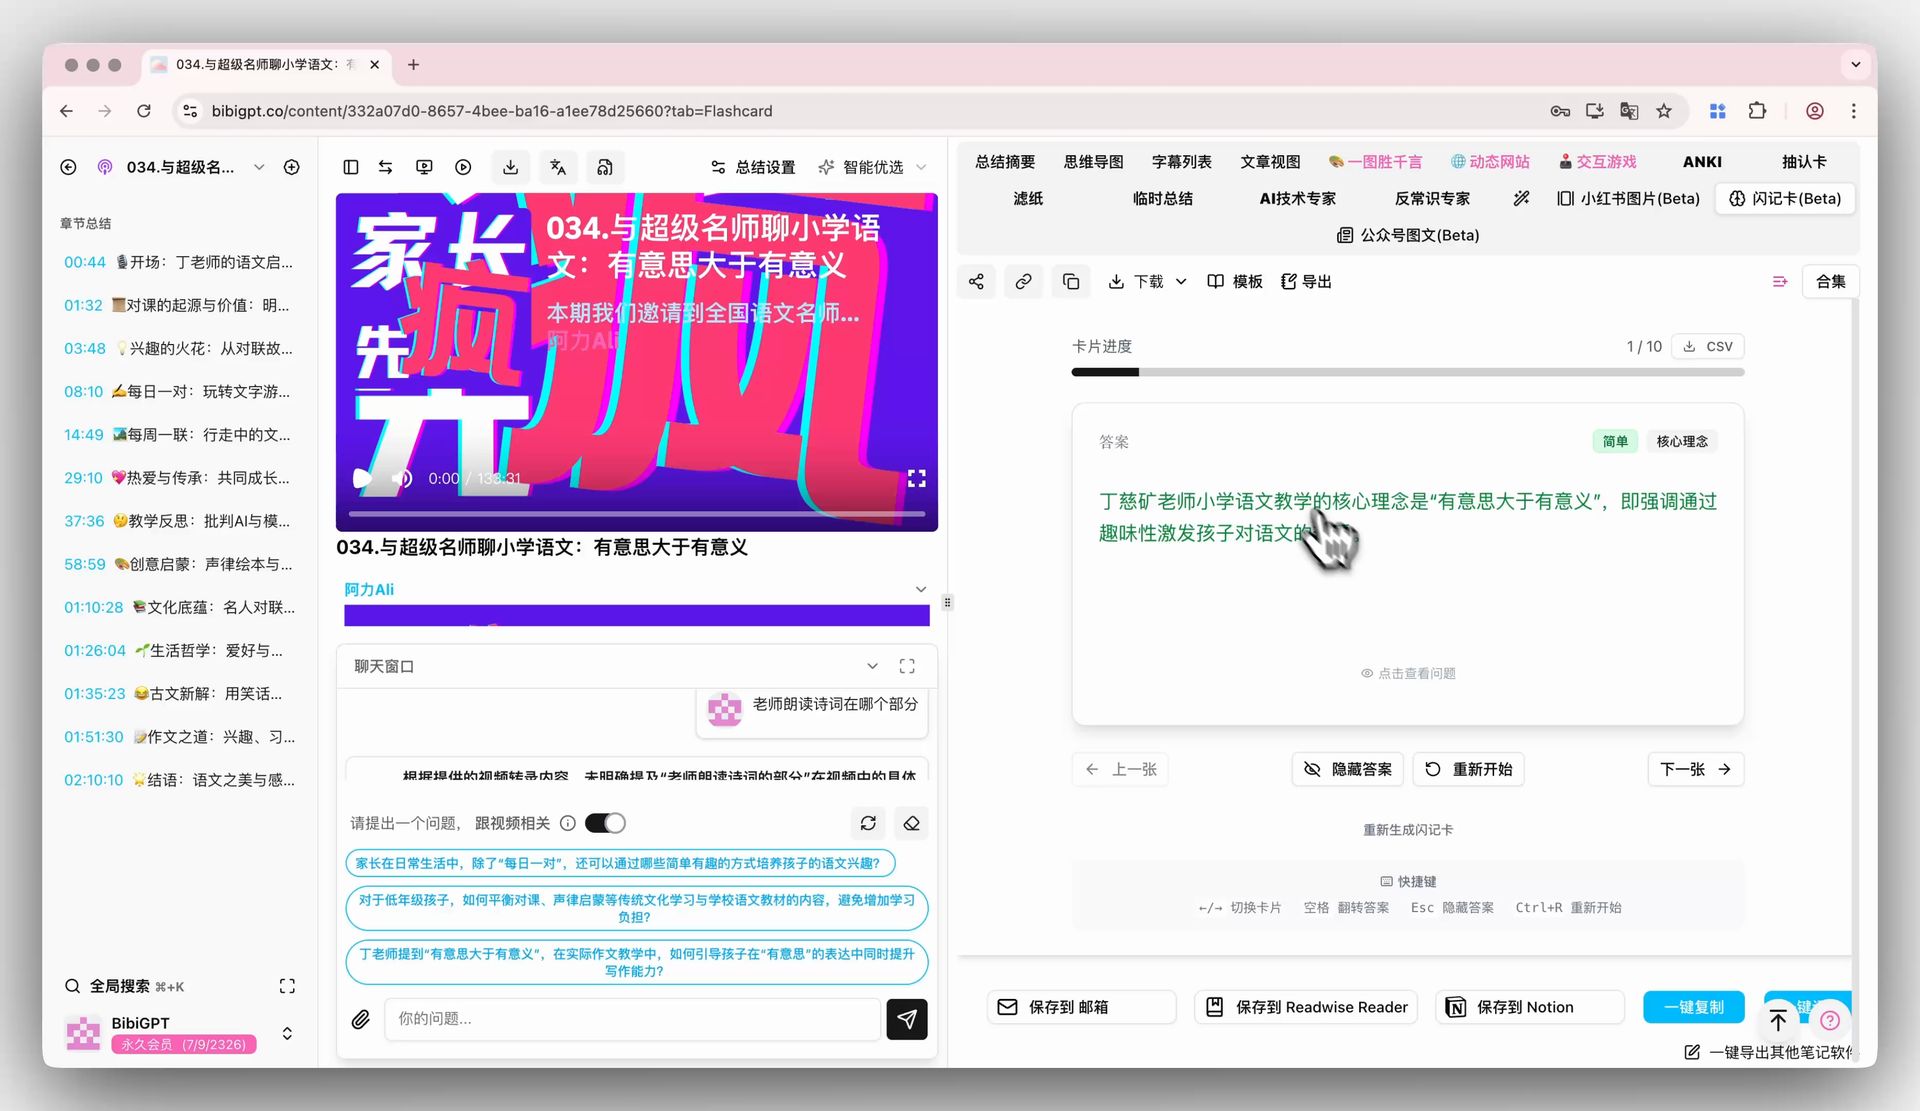
Screenshot: BibiGPT · Flashcard Review Feature Demo
If you prefer written notes, there’s a tool for that too. The screenshot below shows the highlight notes feature: AI automatically picks out the sentences most worth marking in a lecture, leaving you to add your own understanding on top.
Screenshot: BibiGPT · AI Highlight Notes Demo
If you want to schedule this whole system into a structured revision plan, read Exam Season Lecture Recording Active Recall Workflow for the methodology and 2026 Student Guide to Summarising Lecture Videos with AI for more tool details.
Practical rule: The endpoint of revising a lecture isn’t “I’ve read through the summary” — it’s “I can close my notes and answer three questions.” Flashcards and exam Q&A are how you prepare for those three questions.
5. Advanced Tips and Common Pitfalls
Batch-process the whole semester and file by subject. Don’t process lectures one at a time as you need them. On the first evening of exam season, run all your recordings through at once and archive them by “Subject → Week number.” Keep each lecture’s summary and flashcards in the same place. The second time you review, you’re working with a searchable notes library rather than a pile of video files — when you need to revisit a specific week, you go straight to the key points.
Accent and terminology: transcribe first, then tackle comprehension. A heavy Indian accent in a statistics course, a Scottish accent in a finance lecture — forcing yourself to listen word by word doubles the cognitive load. Get the transcript first. Look up unfamiliar terms against the written text, or ask AI to explain them, which is far faster than rewinding the audio repeatedly.
English lecture, notes in your first language. The summary language doesn’t have to match the course language: lecture in English, key points in your native tongue, and your revision speed doubles. When you need to quote sources in your essay, go back to the English original to verify exact phrasing.
Privacy and course policy. Before uploading, confirm your institution’s policy on using course recordings. Where possible, use recordings from your own account or ones your professor has explicitly shared — don’t redistribute recordings that include other students’ contributions. Using local file upload (rather than generating a public link) is the safer approach.
Can Zoom’s own AI summary replace this? Zoom has its own AI Companion meeting summary feature. Watch a short official demo first:
Video source: YouTube · Zoom AI Companion Meeting Summary Demo
It works well for meetings, but for revision it has a few hard limitations. According to Zoom’s official documentation, AI Companion summaries are only available on paid plans, require an administrator to enable them, and can only be started during a live meeting by the host or co-host — as a student, you typically don’t have that button. More critically, it cannot retroactively summarise recordings from meetings that have already ended. And the recordings you’re facing at exam time are exactly those already-ended recordings — and what you need from them is exam study notes, not meeting minutes.
Practical rule: Choose tools for the context: meeting software’s built-in summary is fine for keeping meeting notes; turning an entire semester of recordings into a revision system calls for a tool designed for learning.
6. Frequently Asked Questions
Q1: How long does it take to process a 90-minute recording? A: Transcription plus summary typically delivers a first draft in about a minute. Flashcards and follow-up Q&A after that are near-instant. A batch of 12 lectures can all be processed in a single evening.
Q2: My professor has a strong accent and the audio quality is poor — will the transcription be accurate? A: Accuracy on typical classroom recordings is more than sufficient for revision purposes. If a specific technical term is misrecognised, click the timestamp to check the original recording for that moment — it’s still orders of magnitude faster than listening back word by word.
Q3: My lecture mixes Chinese and English — will that work? A: Mixed-language recordings transcribe normally, and you can choose the language for the summary output independently. Generating Chinese-language key points from an English-language lecture is the most common combination among international students.
Q4: There’s no download button on my professor’s shared Zoom cloud recording — what do I do? A: Some professors disable downloads when sharing recordings. You can politely email your professor to request download access, or check whether the original file is available on your course platform (Canvas / Moodle). Recordings you hosted yourself are always downloadable from the Recordings page on zoom.us.
Q5: Is there a free tier? A: BibiGPT lets you experience the core summary workflow after signing up — enough to run through your first lecture and verify the results before deciding whether to upgrade for the full exam season. For students processing an entire semester’s worth of recordings, upgrading and paying per use is better value.
Try It Now
Your time during exam season is your most valuable resource. Stop letting recordings gather dust on your hard drive. Paste your Zoom lecture recording in now, get a summary and flashcards in one minute, and start working through your first round of exam topics tonight:
Paste your Zoom recording and try it now
BibiGPT Team